
How to Groom Your Horse to Shine - in 4 easy steps!
by Stefanie Reinhold
- Do you wonder how to groom your horse more efficiently?
- Would you like to groom your horse to shine?
- Do you want to know how to make your horse like being groomed?
Old-School Grooming is the answer! A few basic tips and tricks will help you get good results and make grooming an enjoyable experience for you and your horse.
Please know: There is no need to invest in a multitude of detanglers, lotions, potions and sprays, instant shine or coat gloss chemicals. It’s all in the ‘elbow grease’ and a few good grooming tools!
How do I groom my horse to shine naturally?
When I got started in horses in the 1970s and groomed 5-10 horses every day plus show grooming on weekends, there were three elements that determined how shiny and well-groomed your horse would look:
- your elbow grease,
- good quality grooming tools and
- a certain amount of technique and skill.
The key to horse grooming success is elbow grease, the right tools and grooming skills!
The 4-Step-Grooming™ System
For the purpose of this article, we will focus on just the horse’s coat. Of course, there is more to it – like hoof care, mane and tail care, and more. But I’ll talk about that in a different post.
This 4-Step-Grooming™ System shows you how to groom your horse naturally and efficiently:
|
 |
What makes the horse's coat shine?
Shine is the hair's ability to reflect light. To reflect light, the individual hair must be healthy, clean and smooth.
- During the grooming process, shine appears as you distribute the hair's natural oils over the entirety of the clean, healthy, smooth hair.
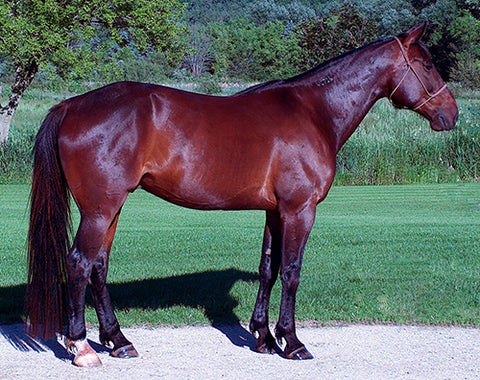
- Shine very much depends on the color of the individual horse. A black or dark bay horse can look real glossy, the shine on a white or grey horse will be more subtle.
Step 1 - Currying
| Tool: A stiff or flexible, non-static, non-scratching curry made from rubber or high-quality synthetic material. Not metal or cheap plastic! (See caution below.) | 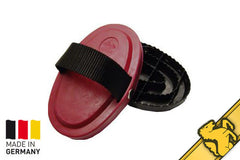 |
How to: Curry from upper neck to hind end on both sides in circular motion, moving carefully on and around joints and bony protrusions. Keep an eye on your horse's face and adjust your pressure to what feels good to your horse.
TIP: Knock the curry against a hard surface every few strokes to remove the dirt.
You will be surprised how much dirt you can bring up, especially in horses that live outdoors 24/7.
 CAUTION: Low-quality plastic curry combs can create micro abrasions on the hair, strip the hair of it’s natural oil coating and create micro scratches on your horse’s skin. This creates a dull coat and leaves your horse prone to skin infections and damaged hair follicles.Use a rubber mitten or a good-quality rubber or plastic curry such as "The Best" curry by Haas or - for a softer feel - massage curry "New Generation". Both of these are good choices. Why we want to curry:
Here is what a good curry comb can do for your horse:
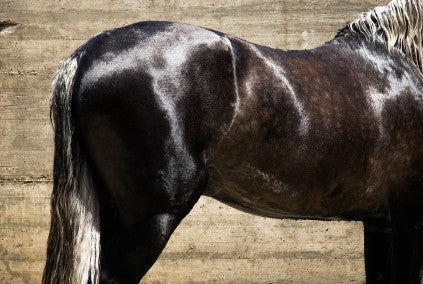
- increase blood circulation in the skin
- relax the tiny erector muscles (see image above) that are connected to each hair follicle (aha! relaxes muscle = flat hair = shine…)
- bring dirt, dander and debris to the surface of the coat, where it can be brushed off
Step 2 - Flicking (using the Dandy Brush)
Tool: A medium stiff brush made of natural or high-quality synthetic materials or natural bristles (and the following is very important!) that does not bind the oils to the brush, but rather distributes them evenly, such as the high-quality, gentle and durable flick brush by Haas, Germany, or this natural flick brush by HorseHaus.
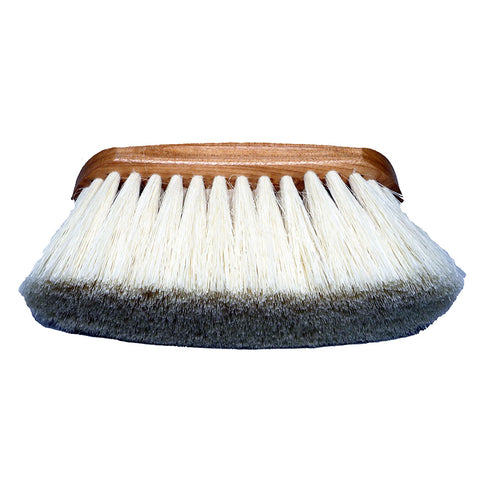
How to: 'Flick' in short strokes - always in the direction of hair growth - starting behind the poll, and flick as if you were using a corn broom to sweep. This movement will bring up dirt and debris and distribute oils. See how the bristles of the brush in the picture flick elastically? That’s what you are looking for. Brush the whole horse this way on both sides and follow up with a second brushing with longer strokes, if needed.

TIP: After every two or three strokes clean the flicking brush on the rubber curry and knock your rubber curry against the wall or ground and see the dirt fall out! You will not want this dirt to remain in your brush, otherwise you’ll just reapply it to your horse. When finished flicking, thoroughly sweep the brush against the rubber curry several times to clean the brush before putting it away.
Make this a habit and you will keep your brush nice and your horse happy!
CAUTION: A coarse synthetic brush will bind the oils to the brush, which then in turn bind dirt to the brush, which you then reapply to your horse. (Defeating the purpose of grooming.) Cheap root brushes will not flick properly! After some time of using them, you will find the bristles bent to one side, making it impossible to 'flick and sweep'. 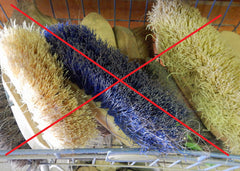 Courageously remove all 'dull coat' and 'scratch' offenders, such as shown on this image, from your tack room! Replace and never look back... These brushes scratch your horse's coat and skin and feel uncomfortable to your horse!
Step 3 - Brushing the Horse's Coat (Finishing)
Tool: A good-quality horse finishing brush is a natural bristle brush with just the right bristle density and length to lift and remove dirt and dander from the coat, distribute oils and smoothen the hair.  These brushes are usually made of horse tail hair or boar bristle. For added 'flick' you can choose a finishing brush with a raised edge.
How to: Work in even, long strokes, starting at the head, always in the direction of hair growth. This will remove all surfaced dirt from the coat, distribute oils for shine, and smoothen the hair coat. Clean the brush against the rubber curry every couple of strokes! This is very important, you don’t want to reapply the dirt to a different area of your horse’s body. Give the horse a second brushing with this brush, if needed.
TIP: This is the brush you will use most. With good care, you will have your high-quality finishing brush for years!
CAUTION: Cheap horse hair brushes (including many name brand brushes!) are much too soft, too loose, not effective, and not durable enough and you will have to frequently replace them. When I buy a horse hair brush I am aware that it comes from a horse and I want it to last for a very, very long time...
Step 4 - Bring on the Shine! (Gloss)
 By now you should have a reasonably clean and good looking horse with some shine to it.You can now want to take it up a notch.
This optional step is also the most fun! And a 'must' if you want to present your horse at its best...
Tool: For a luxurious feel and great results, I recommend a goat hair brush by HorseHaus or the DIVA brush by Haas with luxurious Mattes® lambskin. For the frugal horse person, a felted wool rag, car polishing lambskin mitten or a cloth diaper will do!
How to: Gentle pressure in the direction of hair growth, all over the horse's body. Your goal is to remove the last bit of dust and smoothen the coat. What fun!
TIP: Got an old wool sweater that you washed too hot? Felt it some more in the washing machine, it will be a great gloss rag! NEVER use synthetic rags, as they create static that feels unpleasant to the horse and attracts dirt.
About Grooming Your Horse's Head & Legs
- For the head, let the horse determine what feel comfortable and good. I find a smaller head brush easier to use.
- For the legs, I use a stiffer coco fiber brush or tampico with union fiber brush for tougher mud or dirt.
About Grooming Your Horse's Manes & Tails
- Please see the separate article on 'How to Groom Your Horse's Mane & Tail'.
Thank you and as always,
Enjoy your horse!

Stefanie Reinhold